

Cleaning Sewing Machine Feed Dogs: A Practical Step-by-Step Guide
Quick Summary
To clean feed dogs, switch off and unplug the machine, remove the needle, presser foot and needle plate, then brush away lint and thread. Use a small brush, cotton buds and a narrow vacuum nozzle, and avoid compressed air and sharp metal tools. Check your manual before oiling, as many machines should not be oiled by the owner.
- Switch off and unplug the machine before touching any part of the mechanism.
- Remove the needle and presser foot, then the needle plate, to access the feed dogs.
- Brush from the back of the machine towards the front so lint falls away.
- Never use compressed air, which drives lint further into the mechanism.
- Do not oil the feed dogs unless your manual specifically says to.
Table of Contents
- Why Your Feed Dogs Need Regular Cleaning
- What You Need Before You Start
- Step 1: Switch Off, Unplug and Remove the Needle and Presser Foot
- Step 2: Remove the Needle Plate and Access the Bobbin Area
- Step 3: Raise the Feed Dogs and Brush Away Lint and Thread
- Removing Trapped Thread Safely with Tweezers
- When Not to Oil and Whether to Oil After Cleaning
- Why Your Sewing Machine Feed Dogs Are Not Feeding Fabric
- How Often to Service a Sewing Machine and Clean Feed Dogs
- Booking Your Machine Check or Next Clean at Fabric Mouse
- Frequently Asked Questions
Cleaning the feed dogs is one of the simplest jobs you can do yourself, and it often fixes fabric that won't move smoothly. Lint and thread build up under the needle plate over time, and when they do, the feed dogs cannot grip your fabric properly. Before you start, check your machine's manual, because access routes and oiling points differ between models.
Fabric Mouse is a family-run sewing-machine shop and showroom in Brompton on Swale, North Yorkshire. The steps below will help you clean the feed dogs safely at home.
Why Your Feed Dogs Need Regular Cleaning
The feed dogs are the small metal teeth beneath the presser foot. They pull fabric through the machine as you stitch. Lint from cotton, fleece and felt collects in the grooves between the teeth, along with small thread pieces and fabric scraps.
When the teeth clog, fabric can bunch, stitches can shorten or skip, and the material may slide unevenly. Cleaning removes the blockage and restores grip. How often you need to do it depends on how much you sew and what you sew. A machine used daily for quilting will need attention far more often than one used for occasional hemming.
What You Need Before You Start
Gather these items before you begin:
- A small brush, such as the cleaning brush in the Hemline Sewing Machine and Overlocker Maintenance Kit
- A small screwdriver and a large screwdriver, if your model needs them
- Tweezers for trapped thread
- Cotton buds
- A vacuum attachment with a narrow nozzle
- Sewing machine oil, only if your manual says to oil the machine
The Hemline kit includes a large screwdriver, a small screwdriver and a cleaning brush, and it is a practical way to keep these tools together. It is available at Hemline Sewing Machine and Overlocker Maintenance Kit on our website. Unplug the machine and follow its manual for routine cleaning. This kit does not replace professional servicing.
Step 1: Switch Off, Unplug and Remove the Needle and Presser Foot
Safety comes first. Switch the machine off and unplug it from the mains before you touch any part of the mechanism.
Next, raise the needle to its highest point and remove the needle. Then lower the presser foot and remove it. Removing both gives you clear access to the needle plate.
Set the needle and presser foot aside somewhere safe. Keep the screws and small parts together so you can reassemble the machine without losing anything.
Step 2: Remove the Needle Plate and Access the Bobbin Area
Most machines have a needle plate held by one or two small screws. Use the correct screwdriver and loosen the screws without forcing them. Lift the plate away carefully.
Beneath the plate you will find the feed dogs and the bobbin or shuttle area. Remove the bobbin case if your manual says this helps you clean the area. Take care not to bend any parts.
Some models are different. Certain machines have a hinged or slide-off cover rather than a removable plate, so check your manual before you pull anything off.
Step 3: Raise the Feed Dogs and Brush Away Lint and Thread
Many machines let you raise the feed dogs to make cleaning easier, but the mechanism differs. On some models you turn a dial or slide a lever on the bed of the machine; on others the feed dogs drop automatically when you select a stitch for free-motion work. Your manual will show whether raising them is possible and how to do it. If your manual does not describe raising the feed dogs, do not force any lever, clean them in their lowered position instead.
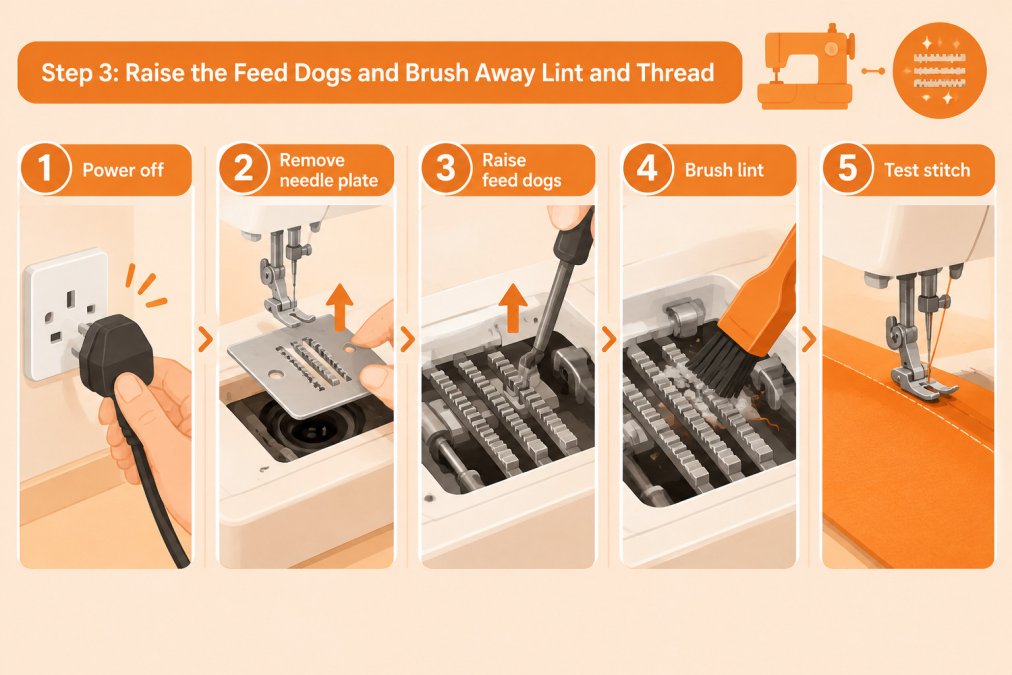
Brush the feed dogs gently with your small brush. Work from the back of the machine towards the front so that lint falls away from the mechanism rather than deeper into it. Use a cotton bud to clean between the teeth and into any corners. A narrow vacuum nozzle can then lift loose debris from the area around the feed dogs and the surrounding surfaces.
Watch out: avoid compressed air for this job. It can drive lint further into the mechanism, where it is harder to remove. Sharp metal tools, including needles, seam rippers and craft knives, can scratch the needle plate, burr the feed-dog teeth and damage the bobbin case. Tweezers are the only pointed tool you should use, and only for gripping thread, not for scraping.
A common pattern is that lint builds up fastest in the gaps between the teeth and at the front edge of the needle plate, where the fabric passes over. Run the brush along the length of each row of teeth rather than across them, and finish by wiping the plate and the surrounding bed with a dry cotton cloth. If your machine has a removable bobbin cover, lift it out and brush the area beneath it as well, because thread ends collect there and can be pulled back into the feed-dog area on the next stitch.
The table below summarises the three key cautions to keep in mind when clearing lint from the feed dogs.
| Tool or method | Use it? | Why |
|---|---|---|
| Small brush | Yes | Clears lint from the teeth |
| Cotton bud | Yes | Reaches between teeth and corners |
| Narrow vacuum nozzle | Yes | Lifts loose debris |
| Compressed air | No | Drives lint further into the mechanism |
| Needles, seam rippers, craft knives | No | Scratch the plate and damage the bobbin case |
| Tweezers | Only for thread | Grips trapped thread without scraping |
Removing Trapped Thread Safely with Tweezers
Sometimes a thread end is wedged deep in the feed dog area. Use tweezers to grip it gently and pull it out in the direction it came from. Pulling sideways can bend small parts or snap the thread inside the mechanism.
If a thread is tightly wound around the bobbin area or under the hook, stop and check your manual. Forcing it can damage the machine. Fabric Mouse provides servicing and repairs across machine brands, so if you cannot remove the thread yourself, contact us and we can look at it for you.
When Not to Oil and Whether to Oil After Cleaning
Cleaning and oiling are not the same job. Many modern machines are sealed and should not be oiled by the owner at all. Others have specific oiling points marked in the manual.
Do not oil the feed dogs unless your manual specifically says to. Too much oil attracts lint, which creates the very build-up you were trying to clear. If your manual calls for oil, use only the type it recommends, apply a single drop to each marked point, and wipe away any excess.
Which oil to use depends on your machine. Our guide on Which Sewing Machine Oil Should You Use at Home? explains the options and what to avoid.
Why Your Sewing Machine Feed Dogs Are Not Feeding Fabric
If your feed dogs are clean and your fabric still will not move evenly, work through the likely causes in order before assuming the machine needs repair. A methodical check saves time and often identifies a setting rather than a fault.
First, check the stitch length. A very short stitch length, or a setting close to zero, reduces the movement of the feed dogs and can make fabric appear to stall. Set a medium stitch length and test on scrap fabric.
Second, check the presser-foot pressure. Most machines have a pressure dial or screw on the head. Too little pressure lets the fabric lift off the feed dogs; too much can grip the fabric so firmly that the teeth cannot advance it. Adjust in small increments and test after each change. Your manual will state whether your model has adjustable pressure and where the control sits.
Third, check that the presser foot is down and correctly seated. A foot that is not fully lowered, or one that is the wrong type for the fabric, can prevent the feed dogs from gripping. A straight-stitch foot on thick fabric, or a foot with a damaged sole, is a common culprit.
Fourth, check the feed-dog height. On most machines the teeth should rise just above the needle plate at their highest point, but the correct height varies by model and by fabric weight. This is not a beginner adjustment. If you suspect the feed dogs are sitting too low or too high, stop and have the machine checked rather than turning screws yourself.
Fifth, look for mechanical causes. A bent feed-dog tooth, a worn feed-dog drive belt, a loose stitch-length mechanism or a damaged bobbin case can all interrupt feeding. These are service items, not routine maintenance.
Watch out: if the machine makes a grinding or clicking noise when you turn the handwheel with the feed dogs engaged, stop using it. Continuing to stitch can turn a small mechanical fault into a larger repair.
Tension problems often appear alongside poor feeding, so it is worth checking the thread path and tension settings before concluding the feed dogs are at fault. Our guide on How to Troubleshoot Sewing Machine Tension Problems walks through the common checks. If the problem continues after cleaning and these checks, the feed-dog mechanism or another part may need professional attention. Fabric Mouse services and repairs sewing machines, so if you cannot resolve the issue yourself, we can look at it for you.
How Often to Service a Sewing Machine and Clean Feed Dogs
A simple rule helps. If you sew most days, clean the feed dogs every few weeks, and service the machine professionally at least once a year. If you sew occasionally, clean the area after each project that produces a lot of lint, such as fleece or felt.
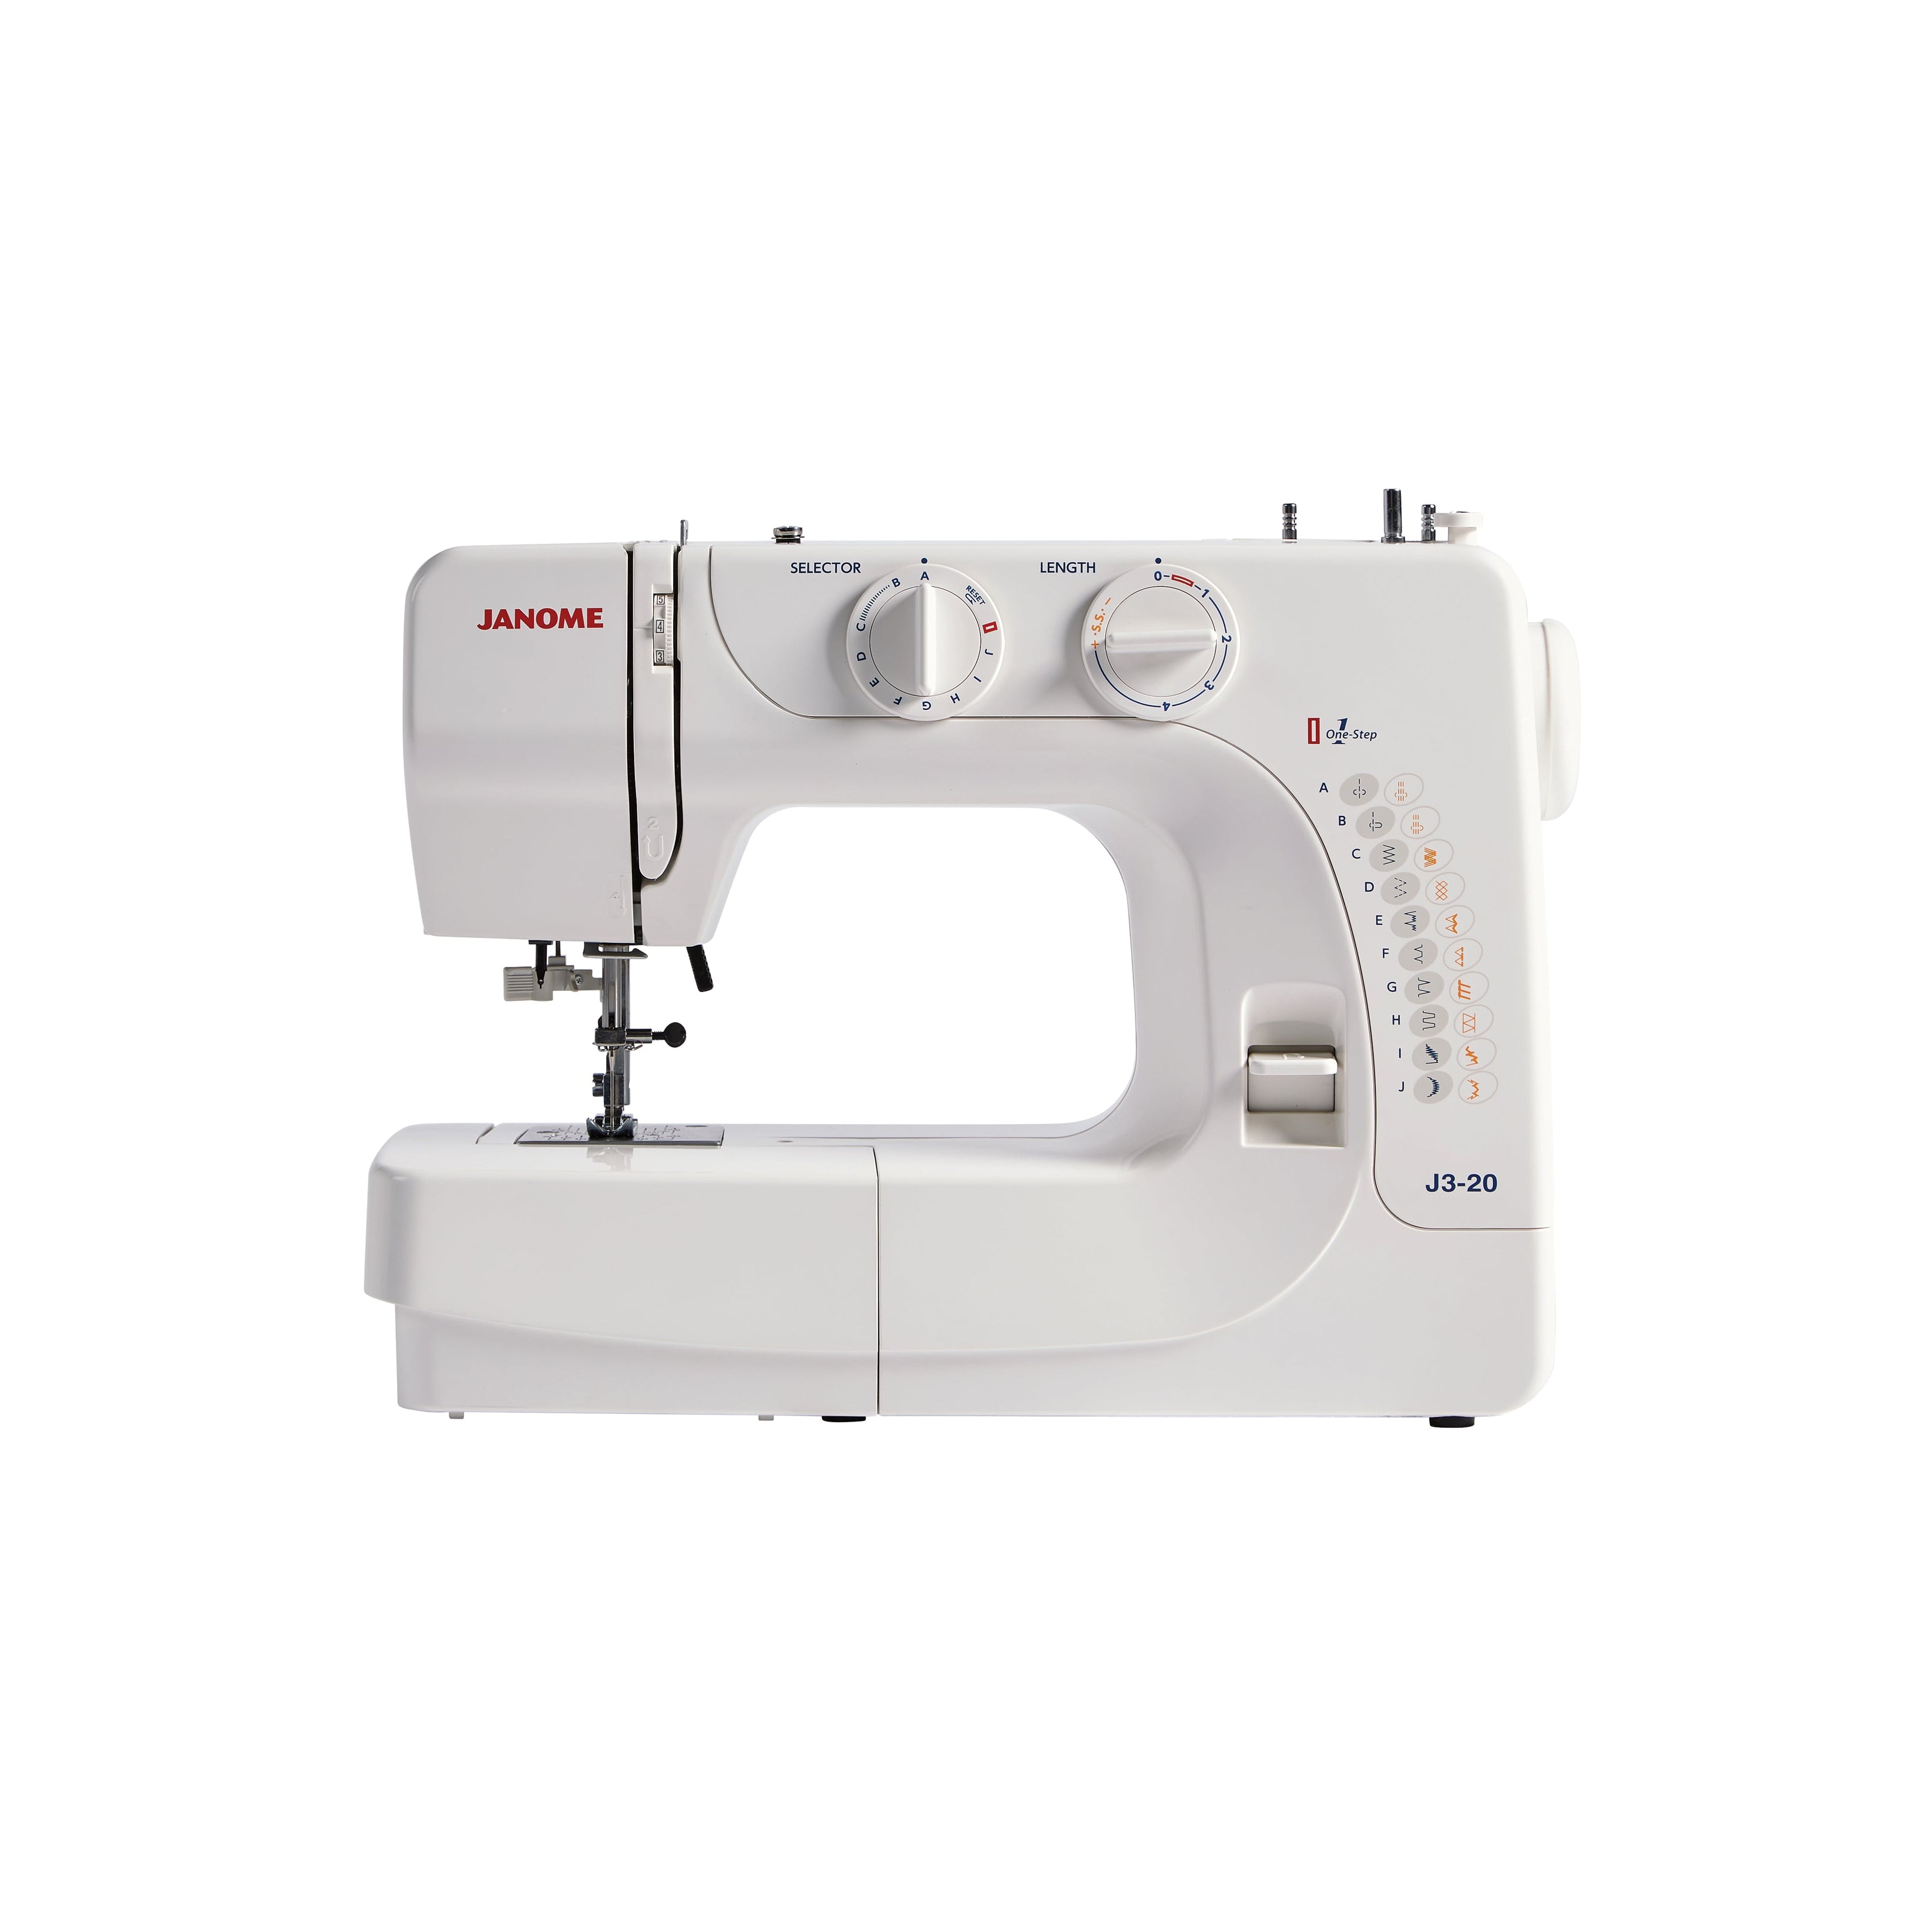
Regular servicing checks parts that you cannot safely reach yourself. Our team can carry out a full service and clean, and you can find details on our Janome J3 20 Sewing Machine Easy Tough page if you are considering a machine that is easy to maintain at home.
Booking Your Machine Check or Next Clean at Fabric Mouse
After you have cleaned the feed dogs, test the machine by stitching a few lines on scrap fabric. Check that the fabric moves evenly and the stitches look balanced. Reassemble the needle plate, presser foot and needle, and make sure all screws are tight.
If the machine still does not feed properly, or if you would prefer a professional clean, contact us to arrange a check. You can read more about the support we offer on our Why Choose Expert Sewing Machine Support in 2026 page. Please call or get in touch through our contact page before bringing a machine in, so we can confirm availability and talk through the work involved.
Frequently Asked Questions
How do you clean the feed dogs on a sewing machine?
Switch the machine off and unplug it, then remove the needle and presser foot. Take off the needle plate following your manual, raise the feed dogs if your model allows, and brush out lint and thread with a small brush. Remove any trapped threads carefully, refit the plate and test-stitch on scrap fabric. Always check your manual first, as access methods differ between machines.
Can you clean sewing machine feed dogs without removing the needle plate?
Sometimes, depending on the model. Some machines allow you to brush lint from around the feed dogs once the needle plate is open or the feed dogs are raised, without fully removing the plate. Check your instruction manual for the exact access method for your machine before attempting this, and avoid forcing any part that does not release easily.
Should you oil sewing machine feed dogs after cleaning?
Not automatically. Many modern machines are sealed or self-lubricating, and oiling where the manual does not call for it can cause build-up. Only oil the points your manual specifies, using the oil type it recommends, and wipe away any excess. If you are unsure, ask for guidance before adding oil.
How often should you clean the feed dogs on a sewing machine?
Clean the feed dogs whenever you change bobbins or after a project that produced a lot of lint, such as fleece or heavy quilting. Machines used daily or for long sessions may need more frequent attention than occasional home use. Regular checks help prevent fabric feeding problems before they start.

Related Posts

How to Adjust Sewing Patterns for a Full Bust

How to Calculate Fabric Yardage for Beginners

How to Clean and Oil Your Embroidery Machine Properly

How to Sew with Cotton Jersey Fabric: A Practical Guide

Choosing Embroidery Software for Beginners: A Practical Guide

How to Troubleshoot Sewing Machine Tension Problems
