

How to Clean and Oil Your Embroidery Machine Properly
Last Updated: 8 November 2026
Quick Summary
To clean and oil your embroidery machine, switch off and unplug it, then brush lint from the bobbin area, hook race and under the needle plate before applying oil. Apply one drop only at each point your manual marks, and never oil a machine your manual says runs without user oiling.
- Always clean before you oil, because oil traps lint and pushes grit into moving parts.
- Never blow into the bobbin area with your breath or compressed air.
- Use only sewing-machine oil, never household oil, cooking oil or silicone spray.
- Brush out loose lint before each session and clean the bobbin area every few sessions.
- Multi-needle machines have more oil points, so work through one needle position at a time.
Table of Contents
- Why Regular Cleaning and Oiling Keeps Your Embroidery Machine Running
- How to Clean an Embroidery Machine Before You Oil It
- Embroidery Machine Cleaning Tools That Are Safe to Use
- Where to Oil an Embroidery Machine
- How Often to Oil an Embroidery Machine
- Cleaning and Oiling Multi-Needle Versus Single-Needle Machines
- Troubleshooting After Maintenance
- Booking a Service or Individual Help with Your Machine
- Frequently Asked Questions
Why Regular Cleaning and Oiling Keeps Your Embroidery Machine Running
Learning how to clean and oil your embroidery machine is the single most useful habit you can build as an embroidery owner. A machine that gets a regular brush-out and the right drops of oil in the right places is far more likely to stitch cleanly over the years. One that doesn't starts skipping stitches, snapping thread and sounding rough.
Here's the honest truth most guides skip: your machine's manual is the boss, not this article. Cleaning access, oil points and oil quantity vary between models. Some machines need oil. Others are built to run without you adding any. We'll show you the general method, then tell you where to check your own manual before you touch anything.
Below, we'll walk through cleaning before oiling, the tools that are safe to use, where oil actually goes, and how often to do it all.
How to Clean an Embroidery Machine Before You Oil It
Always clean before you oil. Oil traps lint. If you oil a dusty machine, you risk pushing grit into the moving parts instead of protecting them.
Start by switching off and unplugging the machine. Pull the power supply plug out of the wall, not just the machine. Then work through the machine in order, top to bottom, so loose dust doesn't fall back onto parts you've already cleaned.
Clearing Lint from the Bobbin Area and Hook Race
The bobbin area and hook race collect the most lint of any part of the machine. This is where thread ends, dust and fabric residue gather, and where most stitching problems begin.
Remove the bobbin case and lift out the bobbin. Brush away lint from the bobbin area with a soft lint brush. Then clean the hook race, the circular track the rotary hook sits in. A pipe cleaner works well for the groove. Wipe the surfaces with a clean, lint-free cloth.
Watch out: never blow into the bobbin area with your breath or compressed air. Moisture and forced air push lint deeper into the machine.
If your bobbin case is worn or damaged, a replacement keeps the machine running true. You can find the Brother embroidery bobbin case in our shop. Once the area is clean, it's also a good moment to restock bobbin thread for Brother machines so you're ready for the next project.


Cleaning the Needle Plate and Feed Dogs
Lint builds up under the needle plate and around the feed dogs, the small teeth that move the fabric. Left alone, it affects stitching and can cause thread tension problems.
Remove the screws holding the needle plate. Keep them somewhere safe, because they are small and easy to lose. Lift the plate away and brush out the lint and fabric residue underneath. Clean around the feed dogs with your lint brush, then wipe with a clean cloth and refit the plate.
Use the correct screwdriver for the job. A driver that doesn't fit properly can damage the screw heads. Our Brother needle plate screwdriver is made for this task.
Embroidery Machine Cleaning Tools That Are Safe to Use
Safe cleaning comes down to a short list of simple tools. You don't need a kit full of gadgets.
- A soft lint brush for loosening dust and thread ends
- A clean, lint-free cloth for wiping surfaces
- Pipe cleaners for grooves such as the hook race
- Small curved snips for trimming thread tails and jump stitches
That last one matters more than people expect. Loose thread tails left on the fabric get pulled into the bobbin area and add to the lint problem. Our curved embroidery snips have fine curved tips for reaching threads above the fabric surface.
Avoid anything sharp, metal or abrasive inside the machine. Never use household spray cleaners on the mechanism.
Where to Oil an Embroidery Machine
Oil goes only where your manual says it goes. That single rule matters more than any diagram, because oil points differ between models and between single-needle and multi-needle machines. On most domestic embroidery machines the manual identifies a small number of marked points on moving parts, often around the hook race and where metal meets metal under load. Your manual names them; this article cannot, because the layout is model-specific.
Before you pick up the oil, find three things in your manual: the oil type it specifies, the oil points it marks, and whether it lists oiling at all. If any of those is missing, stop and check with the manufacturer or with us before adding oil.
How to Apply Oil Without Over-Oiling
Apply one drop at each marked point. One. More oil does not mean better lubrication. Excess oil migrates onto the fabric, stains your work and attracts dust, which then turns into grinding paste on the very parts you were trying to protect.
Work with the machine switched off and unplugged, and let the machine sit for a moment after oiling so the oil settles before you run it. Wipe away any residue with a clean, lint-free cloth. An oil pen gives more controlled drops in tight spots than a bottle spout, which is why many owners keep one alongside their lint brush.
Watch out: never substitute household oil, cooking oil, silicone spray or general-purpose lubricant for sewing-machine oil. These can gum up mechanisms, attract lint or damage seals, and the manual specifies the correct type for a reason.
Machines That Must Not Be Oiled by the User
Some machines are designed to run without user oiling, and adding oil can do harm rather than good. Others are intended to be lubricated only by a technician during service.
This is why the manual comes first. If your manual does not show oil points, do not invent them. If it says the machine is lubricated for life, leave it alone. A common mistake is oiling a machine that does not need it because a video or forum post said to. If you are unsure whether your model takes user oil, contact us before you start rather than guessing.
Oil Points on Multi-Needle Machines
Multi-needle machines have more oil points than single-needle models, and the manual usually groups them by needle position or by the rotary hook assembly. Work through one position at a time so nothing is missed, and follow the manual's sequence rather than oiling everything at once. If your manual calls for a technician to lubricate internal components, leave those to a service rather than reaching inside yourself.
How Often to Oil an Embroidery Machine
How often to oil an embroidery machine depends on your model and how much you use it. Your manual gives the manufacturer's interval. Use that as your baseline, then adjust for how hard the machine works. There is no single correct number, and any guide that gives one is guessing.
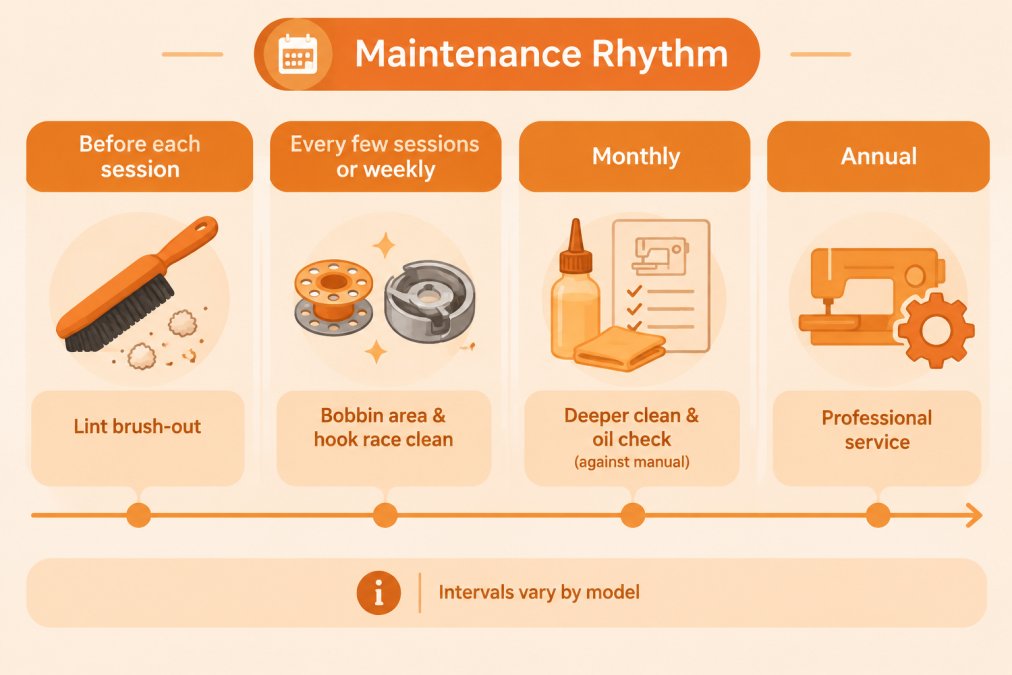
A practical rhythm looks like this:
- Before each session: brush out loose lint and check the needle
- Every few sessions, or weekly on a busy machine: clean the bobbin area and hook race
- Monthly, or per the manual's oil interval: deeper clean and oil only the points your manual names
- Annually, or per the manual's service schedule: professional service
Adjusting the Schedule to Your Work
Stitch volume is the biggest variable. A hobby machine used at the weekend accumulates lint slowly; a machine running dense designs for hours a day builds it fast. Fabric type matters too: towelling, fleece and other high-lint fabrics shed far more residue than a close-woven cotton, so clean more often when you stitch them.
Machines running all day need more frequent attention than a hobby machine used at weekends. Check your manual for the correct interval rather than copying a routine from a different machine.
Signs You Are Cleaning Too Little or Too Often
A machine that skips stitches, snaps thread, sounds rough or leaves thread nests is usually asking for a clean. If those signs appear between your scheduled cleans, shorten the interval. Over-cleaning is rarer but real: repeated dismantling of the needle plate and bobbin area risks losing screws or refitting parts incorrectly, so clean thoroughly rather than constantly.
Watch out: if your manual gives a specific oil interval, do not stretch it because the machine seems fine. Quiet running is not proof that lubrication is adequate.
A practical rhythm for keeping on top of cleaning and oiling, always with your manual's interval as the baseline.
| When | What to do |
|---|---|
| Before each session | Brush out loose lint and check the needle |
| Every few sessions, or weekly on a busy machine | Clean the bobbin area and hook race |
| Monthly, or per the manual's oil interval | Deeper clean and oil only the points your manual names |
| Annually, or per the manual's service schedule | Professional service |
Cleaning and Oiling Multi-Needle Versus Single-Needle Machines
Multi-needle machines collect more lint, because more threads mean more ends and more dust. They also have more tension discs and more oil points, so cleaning takes longer.
Work through one needle position at a time so nothing gets missed. Brush around each tension disc and check each needle for damage. A bent or blunt needle causes skipped stitches and thread breaks, and no amount of oiling fixes that. Our Organ embroidery needles for Brother PR machines are the correct fit for those models.
Single-needle machines are simpler. Fewer thread paths, fewer oil points, quicker clean. The same rules apply: clean first, oil only where the manual says, and never over-oil.
Troubleshooting After Maintenance
If stitching problems appear after a clean and oil, work through the likely causes in order. Most issues trace back to something simple.
- Thread breaks: check the needle is the right type and not damaged, and that the machine is threaded correctly
- Skipped stitches: a blunt or wrong needle is the usual culprit
- Tension problems: check for lint caught in the tension discs
- Rough sound: check the manual's oil points again, and check you haven't over-oiled
One thing to rule out early: if the machine ran well before maintenance and poorly after, retrace what you changed. A needle plate refitted with a screw not fully seated, or a bobbin case not clicked home, causes problems that look like machine faults.
Booking a Service or Individual Help with Your Machine
Some jobs belong with a technician. If your machine still runs rough after a clean, if it makes unusual noises, or if the manual calls for work beyond routine care, book it in. We provide servicing and repairs across machine brands, and we'll always tell you honestly what your machine needs.
If you'd rather learn on your own machine, individual lessons with Stuart are available by arrangement for customers who need a little help using their sewing machine. Contact us before travelling so we can confirm the model is available to demonstrate. You can read more about demonstrations and individual help, or if you're thinking about a machine with easier maintenance, view the Brother PR1 single-needle embroidery machine.

Cleaning and oiling your embroidery machine takes minutes and protects an investment that should last years. The routine is simple: unplug, clean the lint out, oil only the points your manual names, and don't overdo the oil. If you'd like help choosing the right cleaning supplies, needles or oil for your model, or you'd like your machine looked over by our team, get in touch. Fabric Mouse provides servicing and repairs across machine brands, expert advice from a family-run shop, and supplies to keep your machine stitching well.
Frequently Asked Questions
How do you clean an embroidery machine without causing damage?
Switch off and unplug the machine first, then use a soft lint brush and a clean, dry cloth to lift lint, dust and thread ends from the bobbin area, hook race, needle plate and feed dogs. Use pipe cleaners or tweezers for tight corners rather than blowing air into the machine. Never use water, household cleaners or sharp metal tools on internal parts. Check your exact model's manual for which covers you may remove, and stop if anything feels stiff or forced.
Where do you oil an embroidery machine, and which oil should you use?
Oil points differ between models, so the manufacturer's manual is the only reliable guide to where to oil an embroidery machine. Use sewing-machine oil only, applied in single drops with an oil pen or spout, and wipe away any excess so it cannot stain fabric. Never use general-purpose lubricants, cooking oil or sprays. Some machines, including certain models with sealed or self-lubricating components, must not be oiled by the user at all, so confirm before you apply anything.
How often should you oil an embroidery machine?
There is no single interval that suits every machine. How often to oil an embroidery machine depends on the model, how many hours it runs and what the manual specifies, so follow that guidance rather than a generic rule. Many home machines need only a few drops at the points the manual names, while heavily used or commercial machines may need more frequent attention. If you are unsure, contact us before oiling rather than guessing.
Why is my embroidery machine making noise after cleaning?
Noise after cleaning usually means something was not refitted correctly. Check that the bobbin case is seated properly, the needle plate is fully secured and no lint or a stray thread is trapped in the hook race. Confirm the needle is inserted the right way round and correctly seated. If the noise continues, or you have oiled a machine that should not be oiled, stop using it and arrange a service rather than adjusting timing or internal parts yourself.

How to Sew with Cotton Jersey Fabric: A Practical Guide
How to Calculate Fabric Yardage for Beginners
Related Posts

How to Calculate Fabric Yardage for Beginners

How to Sew with Cotton Jersey Fabric: A Practical Guide

Choosing Embroidery Software for Beginners: A Practical Guide

How to Troubleshoot Sewing Machine Tension Problems

What Happens When a Sewing Machine Needle Breaks

Best Sewing Projects for Absolute Beginners: Start Here
